1. Github Pages设置与配置
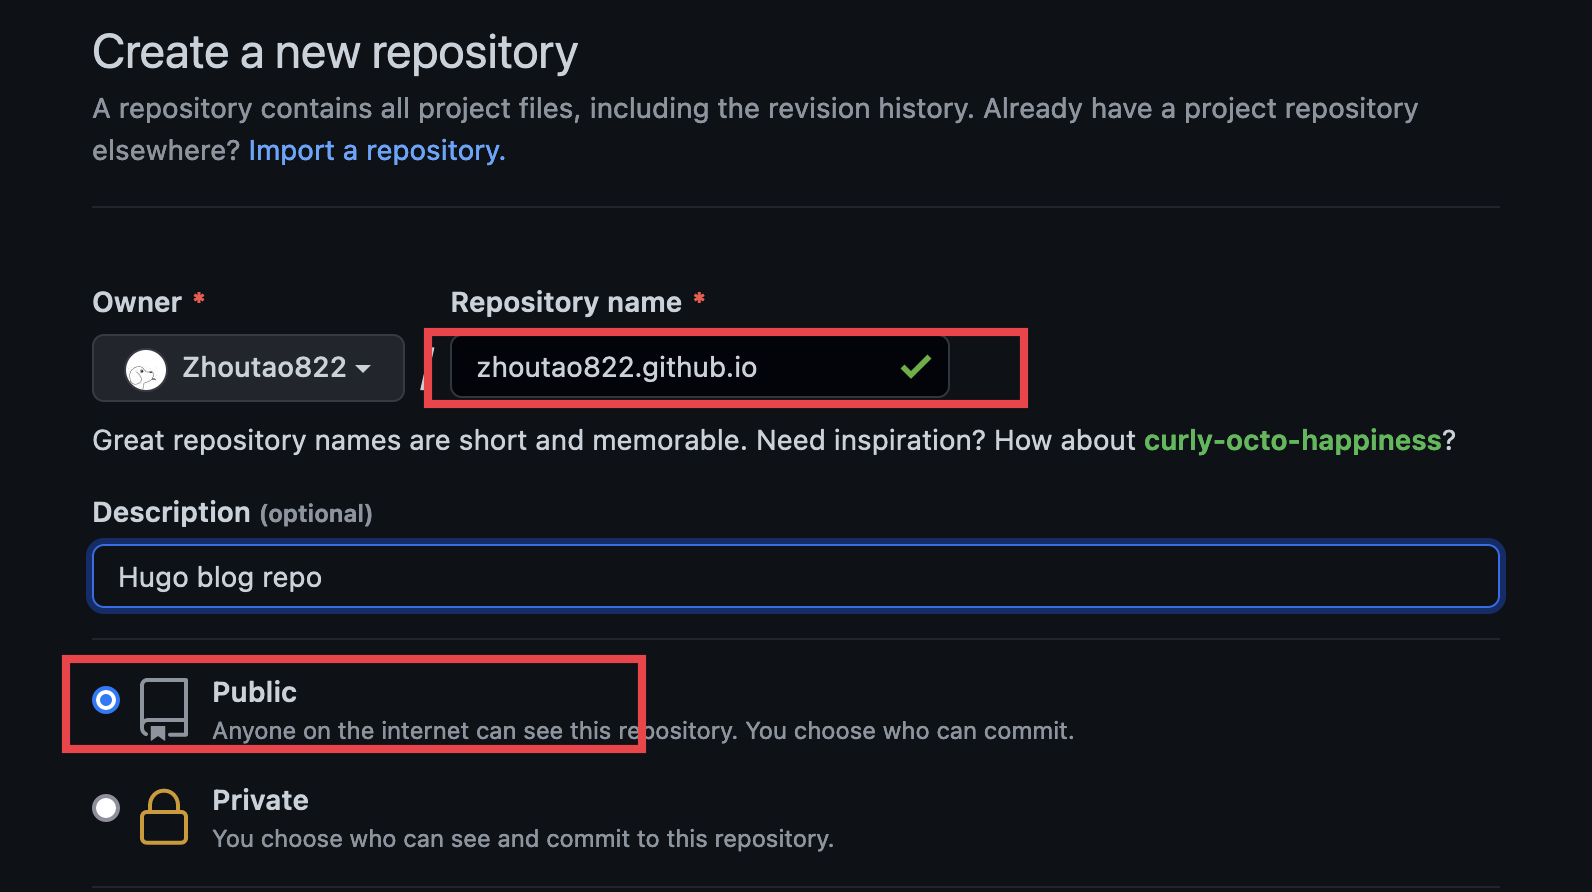
首先需要创建一个名称为{OwnerName}.github.io的Public仓库,如果仓库名称为其他,那么最终你的Github Pages的域名就不是https://{OwnerName}.github.io了,而是https://{OwnerName}.github.io/{RepoName},而且如果这里不是Public而是Private的话,需要付费才能将Private仓库作为Github Pages使用。
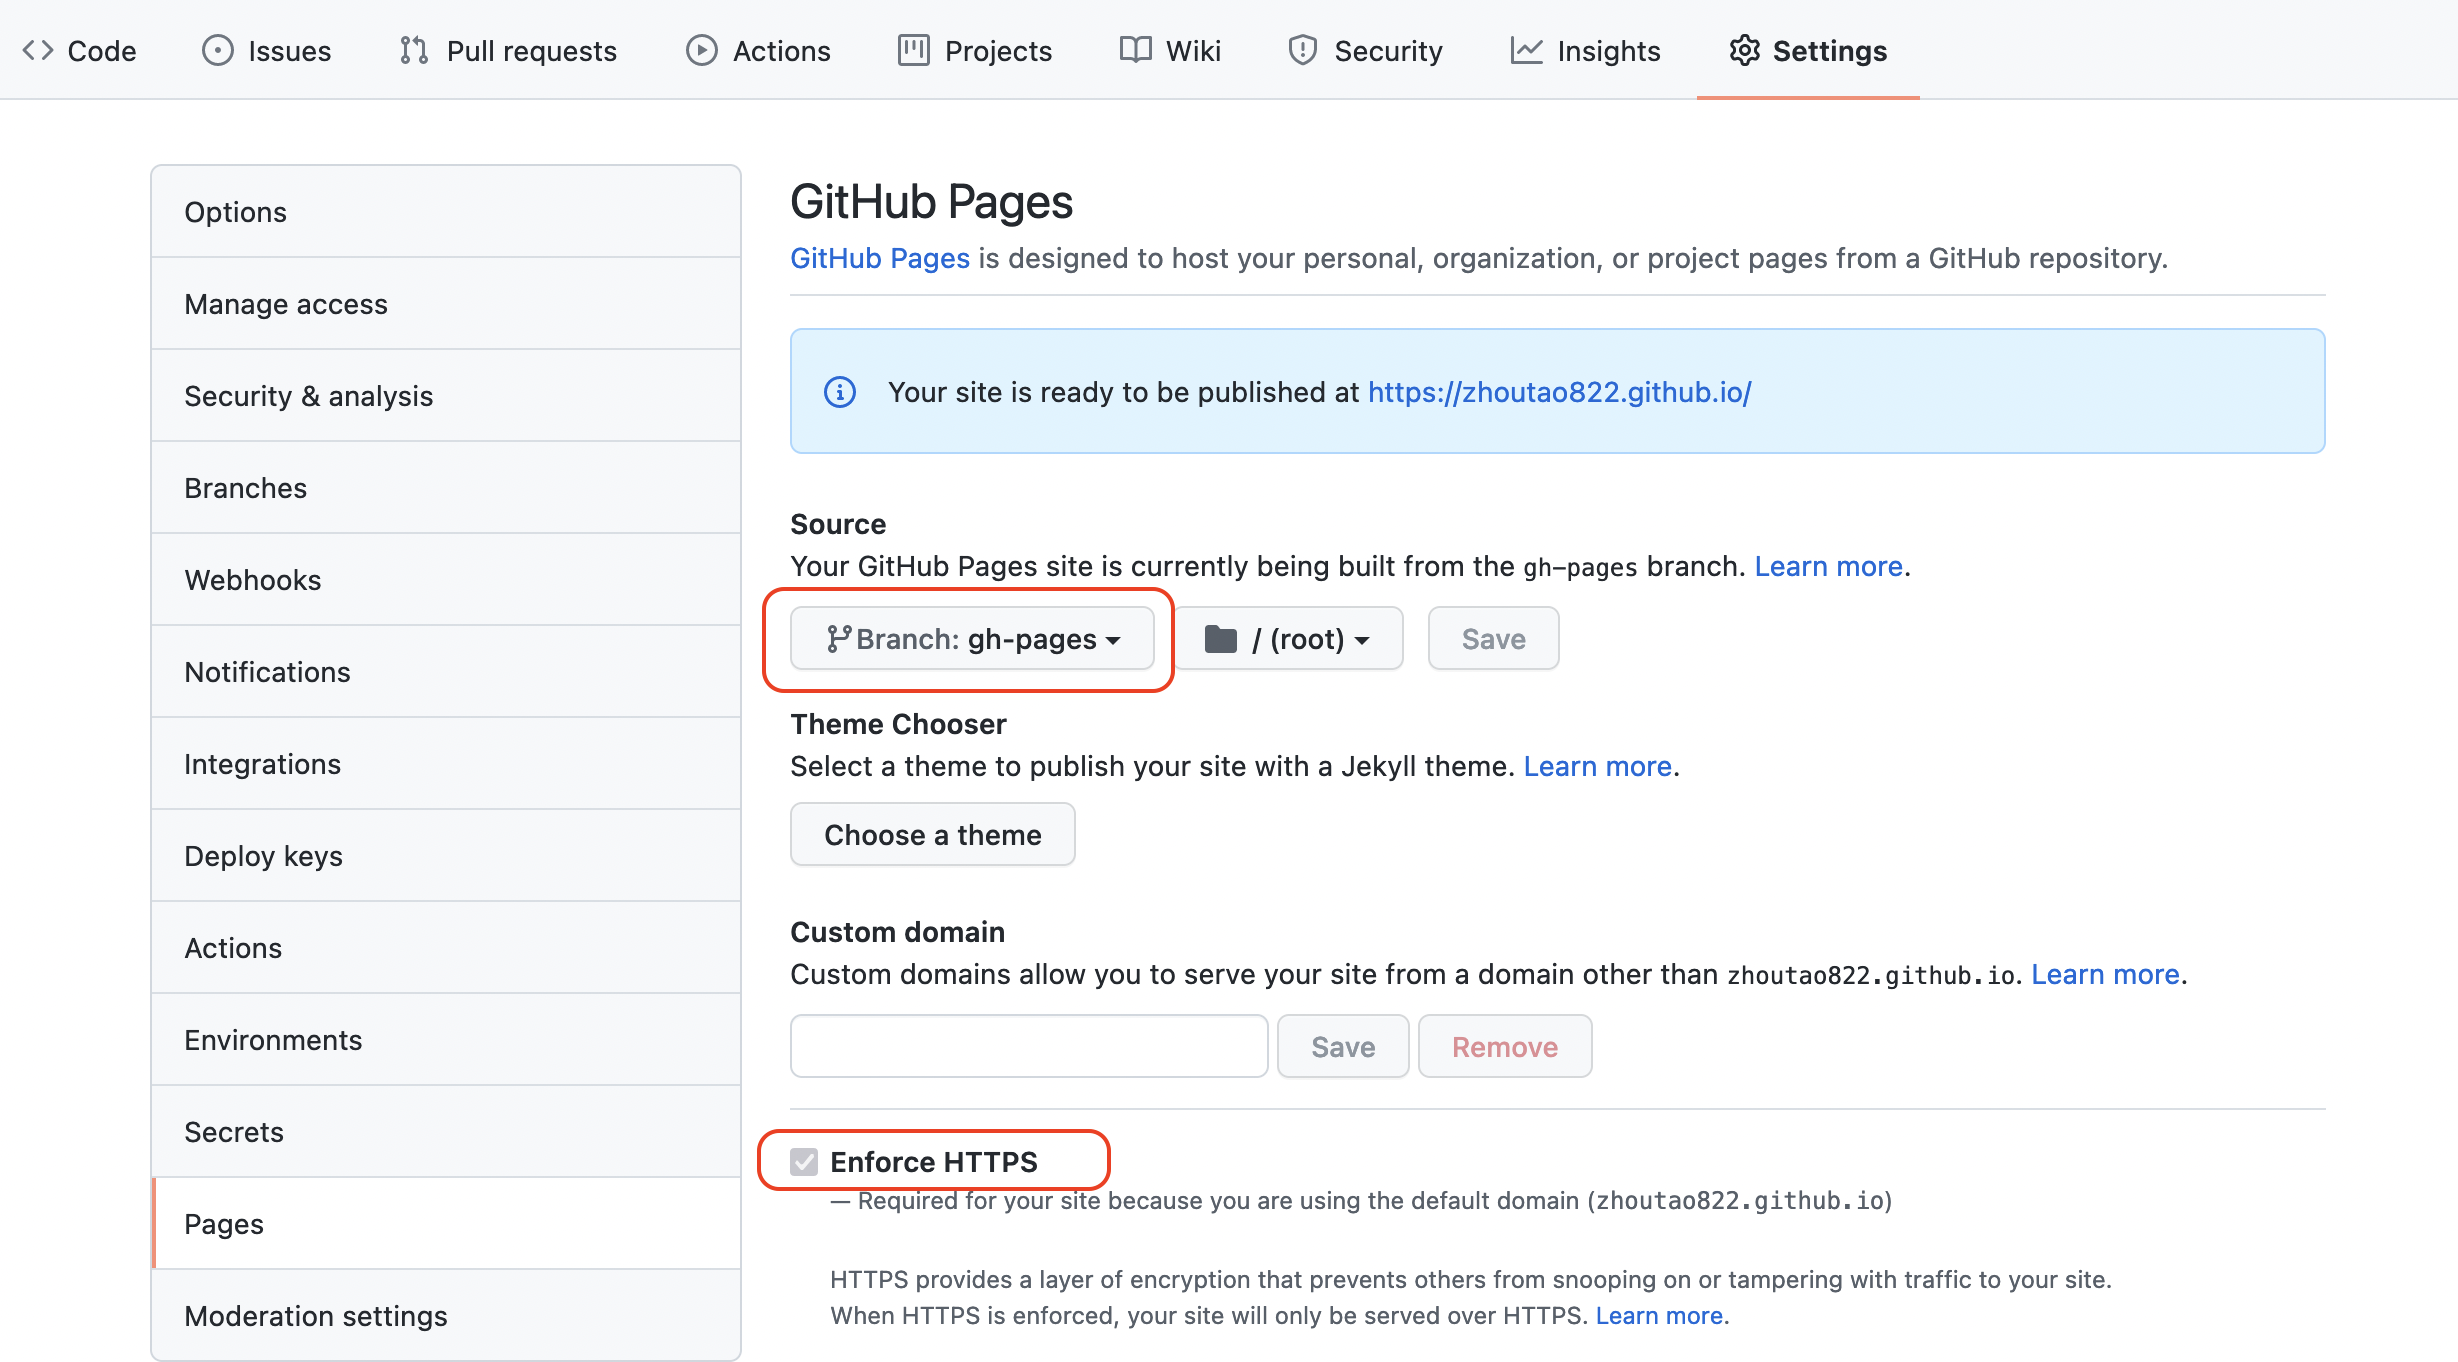
然后创建一个新的分支gh-pages,这个用于后续通过Github Action部署Hugo的静态页面,作为Github Pages的主页;也就是说我们的main分支保存整个Hugo博客工程,而gh-pages分支保存自动生成的静态页面。在仓库Setting下设置Github Pages的Source为gh-pages分支,勾选上Enforce HTTPS,最终访问的域名就是https了。
最后clone一下这个仓库的main分支到本地即可。
2. Hugo安装与使用
2.1 Hugo Install
直接通过brew install hugo即可,Homebrew如何安装可以参考官网Homebrew。安装完成后执行hugo version,打印结果如下表明安装成功:
❯ hugo version
hugo v0.90.1+extended darwin/arm64 BuildDate=unknown
2.2 Hugo Init
在clone仓库之后,通过命令行进入到这个仓库的目录下执行hugo new site . --force,初始化Hugo工程,日志如下:
❯ hugo new site . --force
Congratulations! Your new Hugo site is created in /Users/tao/Documents/hugo-blog.

Just a few more steps and you're ready to go:

1. Download a theme into the same-named folder.
   Choose a theme from https://themes.gohugo.io/ or
   create your own with the "hugo new theme <THEMENAME>" command.
2. Perhaps you want to add some content. You can add single files
   with "hugo new <SECTIONNAME>/<FILENAME>.<FORMAT>".
3. Start the built-in live server via "hugo server".

Visit https://gohugo.io/ for quickstart guide and full documentation.
使用--force是为了能在非空目录中创建Hugo工程。
2.3 Hugo Theme
在Hugo Theme上挑选一个自己喜欢的主题,然后通过git命令添加主题,以PaperMod为例
git submodule add https://github.com/adityatelange/hugo-PaperMod.git themes/PaperMod --depth=1
后续需要更新主题则执行
git submodule update --remote --merge
如果主题安装成功,则项目目录下会多一个.gitmodules文件,内容为
❯ cat .gitmodules
[submodule "themes/PaperMod"]
	path = themes/PaperMod
	url = https://github.com/adityatelange/hugo-PaperMod.git
2.4 Hugo Config
然后修改config文件,默认情况下Hugo创建的是config.toml,这里可以删除这个文件,以config.yaml作为替代,依赖个人习惯决定即可;toml和yaml文件可以通过网站Convert TOML to YAML相互转换。
修改baseURL为Github Pages的域名,并添加theme字段
❯ cat config.yaml
baseURL: 'https://zhoutao822.github.io/'
languageCode: en-us
title: My New Hugo Site
theme: PaperMod
2.4 Hugo Local Test
如果上述步骤都完成了,可以通过hugo new创建一个示例Blog
❯ hugo new posts/my-first-post.md
Content "/Users/tao/Documents/hugo-blog/content/posts/my-first-post.md" created
默认情况下Hugo会生成一些模板数据在Markdown中,比如title之类,这里如果需要把draft改为false。
---
title: "My First Post"
date: 2021-12-12T11:18:58+08:00
draft: true
---

## Hello Hugo!

This is the first hugo blog.
最后执行hugo server,在本地部署,访问http://localhost:1313/可以查看效果
❯ hugo server
Start building sites …
hugo v0.90.1+extended darwin/arm64 BuildDate=unknown

                   | EN
-------------------+-----
  Pages            | 10
  Paginator pages  |  0
  Non-page files   |  0
  Static files     |  0
  Processed images |  0
  Aliases          |  2
  Sitemaps         |  1
  Cleaned          |  0

Built in 16 ms
Watching for changes in /Users/tao/Documents/hugo-blog/{archetypes,content,data,layouts,static,themes}
Watching for config changes in /Users/tao/Documents/hugo-blog/config.yaml
Environment: "development"
Serving pages from memory
Running in Fast Render Mode. For full rebuilds on change: hugo server --disableFastRender
Web Server is available at http://localhost:1313/ (bind address 127.0.0.1)
Press Ctrl+C to stop

PaperMod主题很丰富,需要通过config文件进行配置。
2.5 Github Action配置
Github Action可以实现Push完成后自动编译并部署,所以需要创建文件.github/workflows/gh-pages.yml,最后将本地工程Push到gihub上即可。
name: github pages

on:
  push:
    branches:
      - main  # Set a branch to deploy
  pull_request:

jobs:
  deploy:
    runs-on: ubuntu-20.04
    steps:
      - uses: actions/checkout@v2
        with:
          submodules: true  # Fetch Hugo themes (true OR recursive)
          fetch-depth: 0    # Fetch all history for .GitInfo and .Lastmod

      - name: Setup Hugo
        uses: peaceiris/actions-hugo@v2
        with:
          hugo-version: 'latest'
          # extended: true

      - name: Build
        run: hugo --minify

      - name: Deploy
        uses: peaceiris/actions-gh-pages@v3
        if: github.ref == 'refs/heads/main'
        with:
          github_token: ${{ secrets.GITHUB_TOKEN }}
          publish_dir: ./public
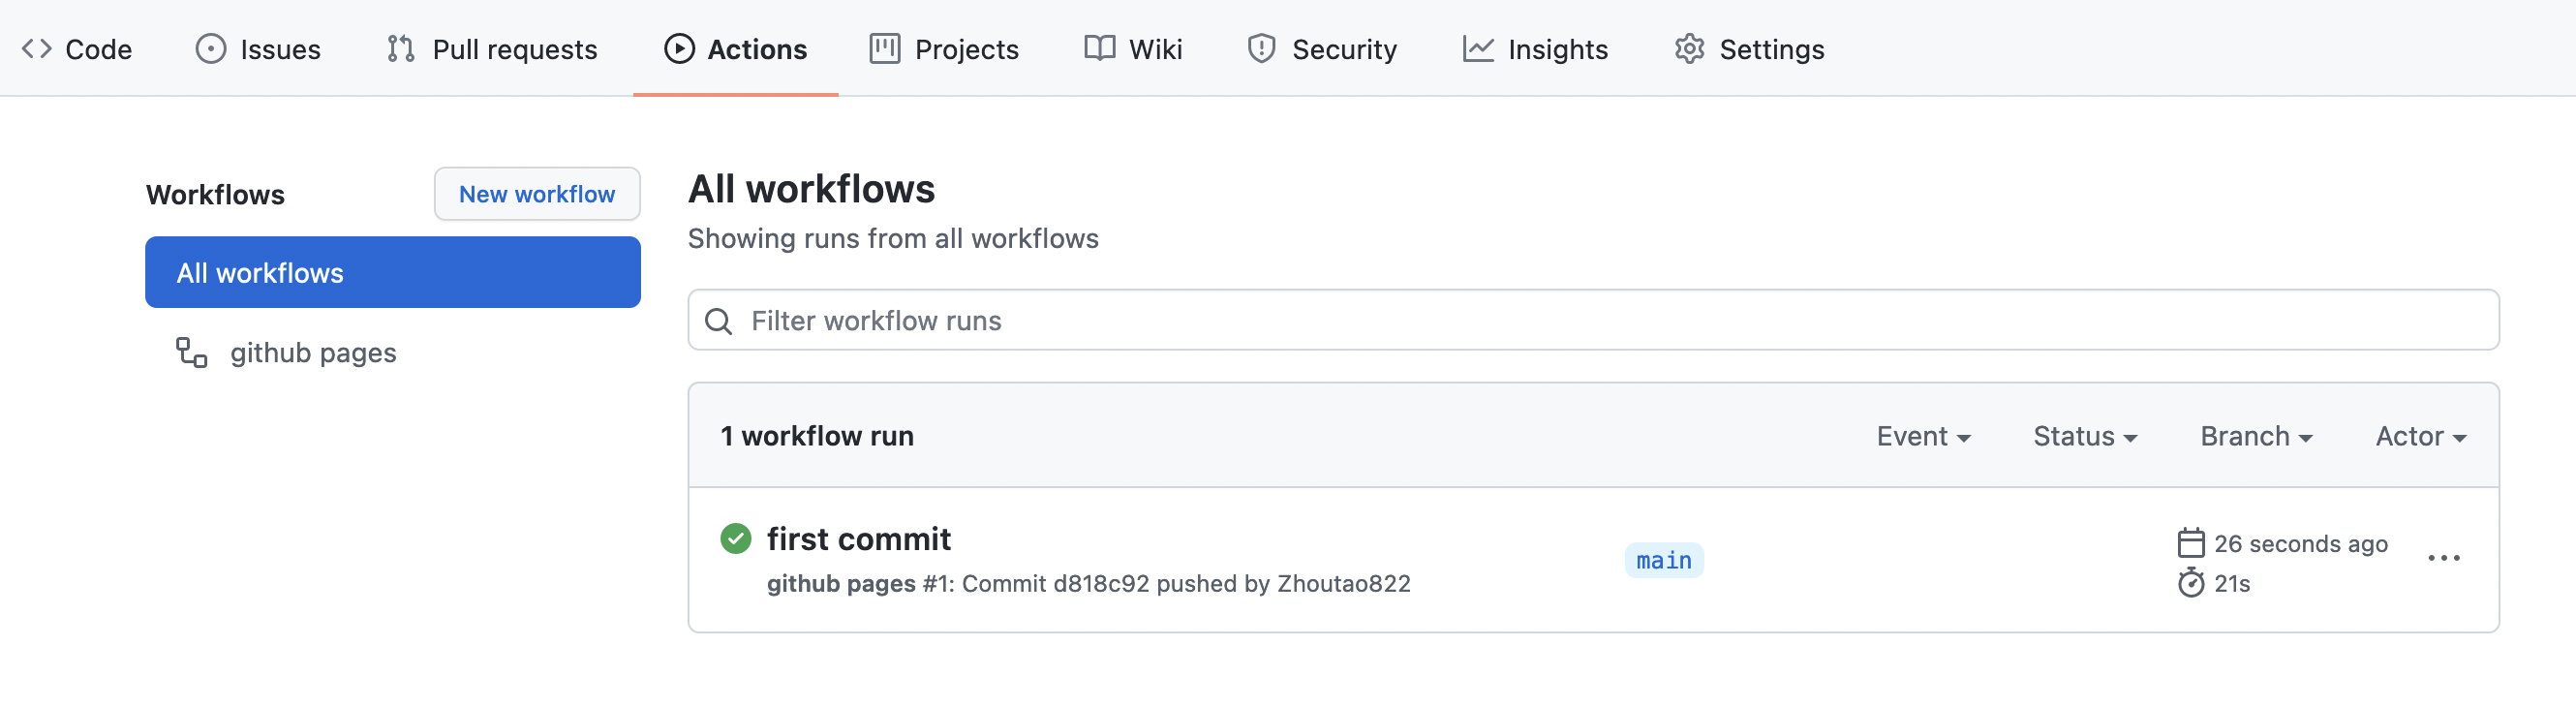
push成功后可以查看Github Action进度。
3. Typora与PicGo
3.1 PicGo安装与配置
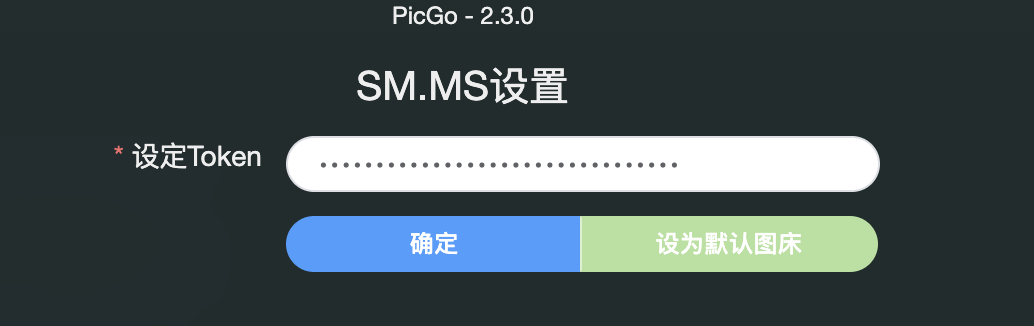
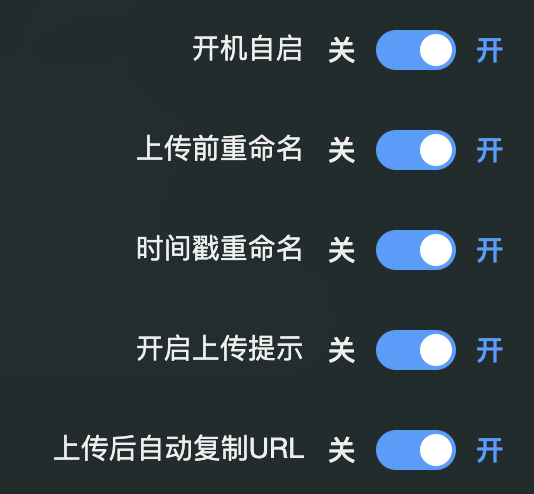
通过brew install picgo --cask安装PicGo,用于图片上传,这里我使用的是SM.MS图床,注册账号并生成token即可使用,可以把上传时重命名勾选上。
3.2 Typora安装与配置
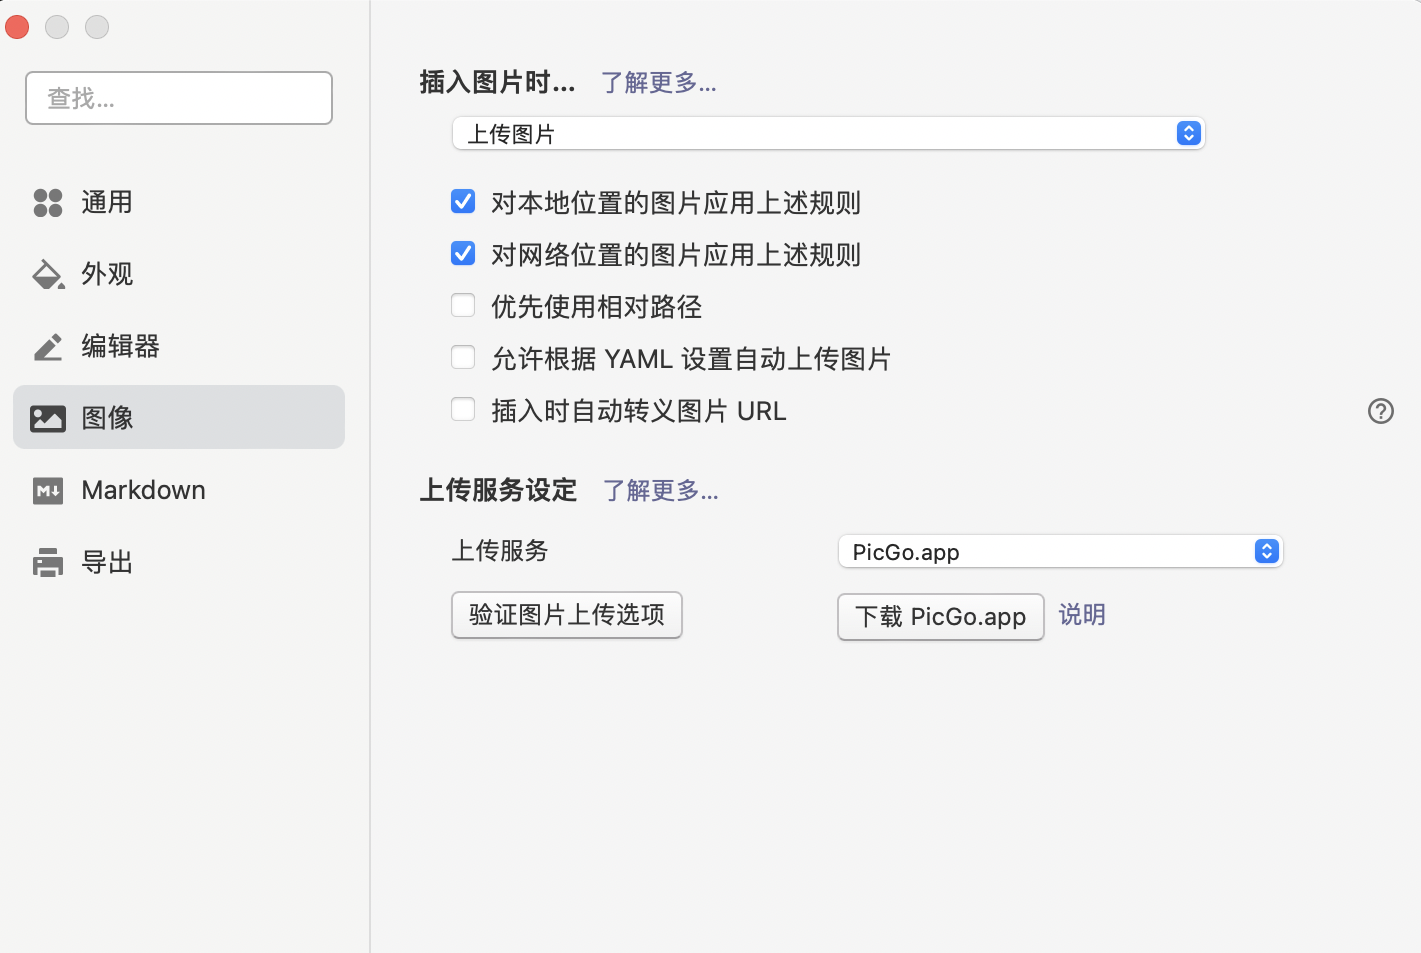
通过brew install typora --cask安装Typora,目前1.0版本后是需要付费使用,0.11版本及之前是免费的;安装完Typora之后需要设置插入图片时的操作,比如在插入本地图片时将图片自动通过PicGo上传到SM.MS图床上,那么Markdown文件中就只需要通过Url显示图片了。
4. 其它配置
4.1 PaperMod主题配置
baseURL: 'https://zhoutao822.github.io/'
languageCode: en-us
title: Tao's Notes
theme: PaperMod
paginate: 5

enableRobotsTXT: true
buildDrafts: false
buildFuture: false
buildExpired: false

googleAnalytics: UA-123-45

minify:
  disableXML: true
  minifyOutput: true

params:
  env: production # to enable google analytics, opengraph, twitter-cards and schema.
  title: Tao's Notes
  description: "Tao's learning notes"
  keywords: [Blog, Portfolio, PaperMod]
  author: Me
  # author: ["Me", "You"] # multiple authors
  images: ["<link or path of image for opengraph, twitter-cards>"]
  DateFormat: "January 2, 2006"
  defaultTheme: auto # dark, light
  disableThemeToggle: false

  ShowReadingTime: true
  ShowShareButtons: true
  ShowPostNavLinks: true
  ShowBreadCrumbs: true
  ShowCodeCopyButtons: false
  disableSpecial1stPost: false
  disableScrollToTop: false
  comments: false
  hidemeta: false
  hideSummary: false
  showtoc: false
  tocopen: false

  assets:
    # disableHLJS: true # to disable highlight.js
    # disableFingerprinting: true
    favicon: "<link / abs url>"
    favicon16x16: "<link / abs url>"
    favicon32x32: "<link / abs url>"
    apple_touch_icon: "<link / abs url>"
    safari_pinned_tab: "<link / abs url>"

  label:
    text: "Home"
    icon: /apple-touch-icon.png
    iconHeight: 35

  # profile-mode
  profileMode:
    enabled: false # needs to be explicitly set
    title: ExampleSite
    subtitle: "This is subtitle"
    imageUrl: "<img location>"
    imageWidth: 120
    imageHeight: 120
    imageTitle: my image
    buttons:
      - name: Posts
        url: posts
      - name: Tags
        url: tags

  # home-info mode
  homeInfoParams:
    Title: "Hi there \U0001F44B"
    Content: Welcome to my blog

  socialIcons:
    - name: twitter
      url: "https://twitter.com/"
    - name: stackoverflow
      url: "https://stackoverflow.com"
    - name: github
      url: "https://github.com/"

  analytics:
    google:
      SiteVerificationTag: "XYZabc"
    bing:
      SiteVerificationTag: "XYZabc"
    yandex:
      SiteVerificationTag: "XYZabc"

  cover:
    hidden: true # hide everywhere but not in structured data
    hiddenInList: true # hide on list pages and home
    hiddenInSingle: true # hide on single page

  editPost:
    URL: "https://github.com/zhoutao822.github.io/content"
    Text: "Suggest Changes" # edit text
    appendFilePath: true # to append file path to Edit link

  # for search
  # https://fusejs.io/api/options.html
  fuseOpts:
    isCaseSensitive: false
    shouldSort: true
    location: 0
    distance: 1000
    threshold: 0.4
    minMatchCharLength: 0
    keys: ["title", "permalink", "summary", "content"]
menu:
  main:
    - identifier: categories
      name: categories
      url: /categories/
      weight: 10
    - identifier: tags
      name: tags
      url: /tags/
      weight: 20
    - identifier: example
      name: example.org
      url: https://example.org
      weight: 30
# Read: https://github.com/adityatelange/hugo-PaperMod/wiki/FAQs#using-hugos-syntax-highlighter-chroma
# pygmentsUseClasses: true
# markup:
#     highlight:
#         # anchorLineNos: true
#         codeFences: true
#         guessSyntax: true
#         lineNos: true
#         style: monokai
4.2 MathJax支持
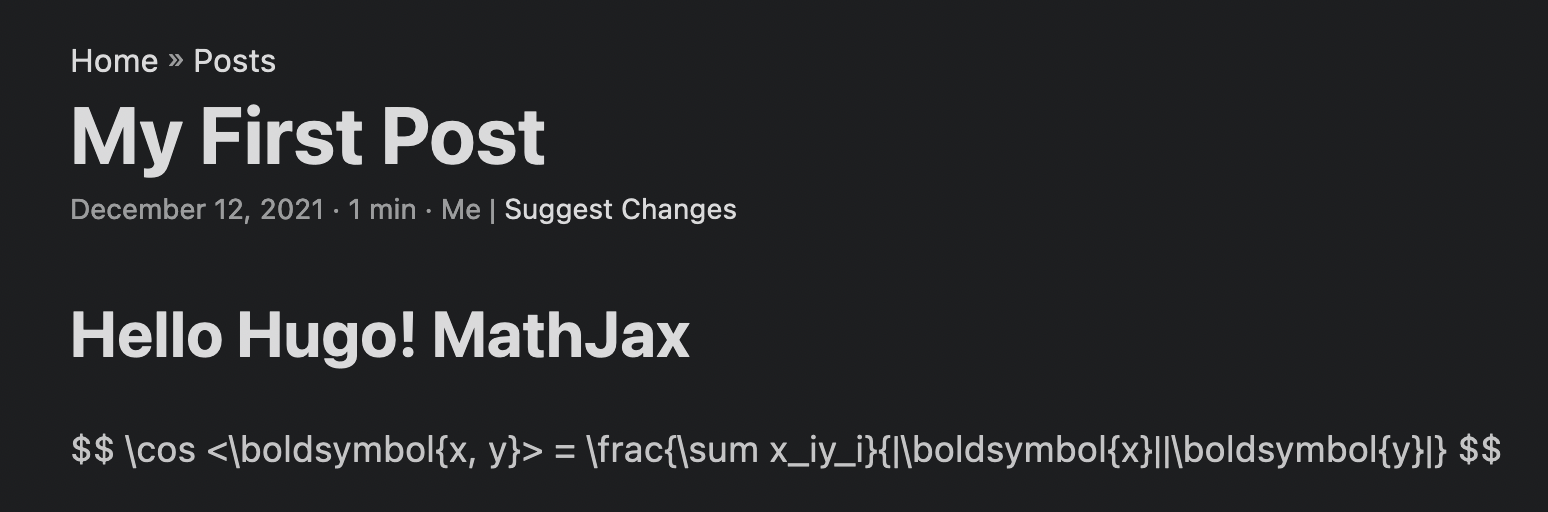
如果直接在Markdown中插入数学公式,在Typora中是可以正常显示,但是部署到Github Pages后是无法解析的,比如
---
title: "My First Post"
date: 2021-12-12T11:18:58+08:00
draft: false
---

## Hello Hugo! MathJax

$$
\cos <\boldsymbol{x, y}> = \frac{\sum x_iy_i}{|\boldsymbol{x}||\boldsymbol{y}|}
$$
因此需要借助JS库来实现Markdown中Mathjax的渲染,参考在Hugo中使用MathJax。首先创建一个文件layouts/partials/mathjax.html
{{ if .Params.math }}
<script>
    MathJax = {
        tex: {
            inlineMath: [["$", "$"]],
        },
        displayMath: [
            ["$$", "$$"],
            ["\[", "\]"],
        ],
        svg: {
            fontCache: "global",
        },
    };
</script>
<script src="https://polyfill.io/v3/polyfill.min.js?features=es6"></script>
<script id="MathJax-script" async src="https://cdn.jsdelivr.net/npm/mathjax@3/es5/tex-mml-chtml.js"></script>
{{ end }}
然后创建layouts/partials/extend_head.html,内容如下,引入mathjax.html;extend_head.html会被hugo自动加载到项目静态资源head.html中。
{{- partial "mathjax.html" . }}
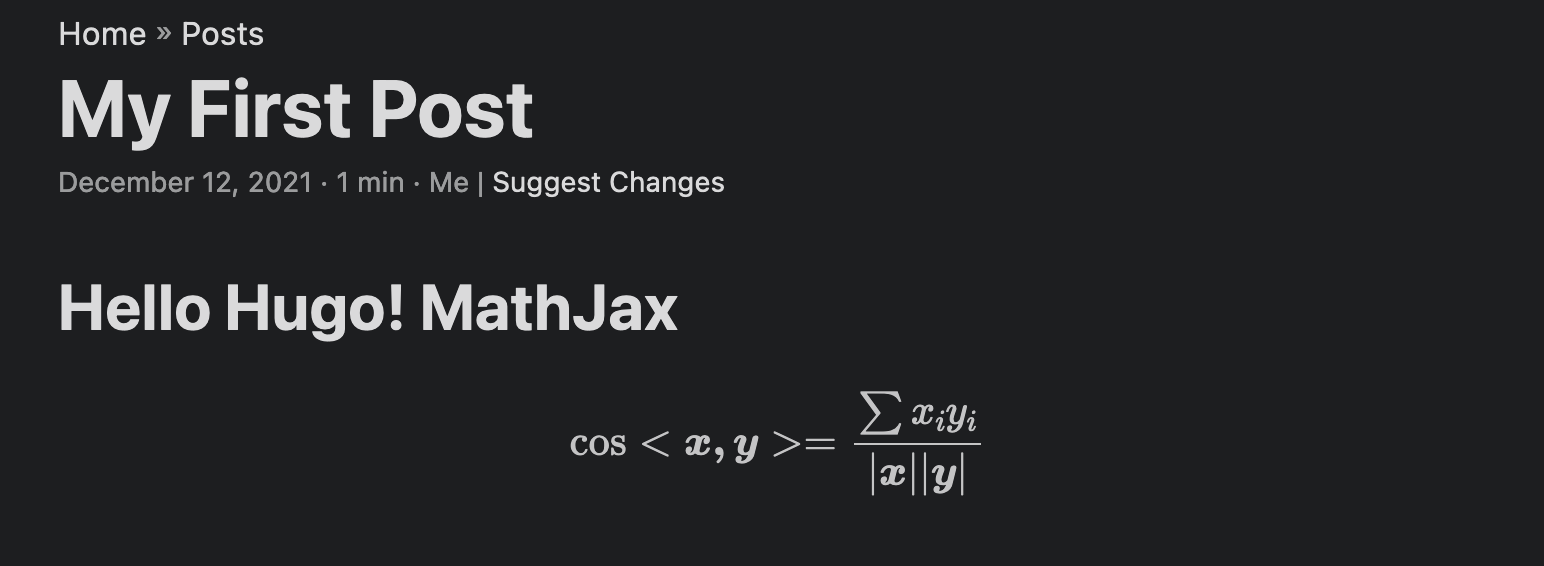
由于mathjax.html中使用了.Params.math,所以可以通过在Markdown文件头添加math: true字段实现按需渲染
---
title: "My First Post"
date: 2021-12-12T11:18:58+08:00
draft: false
math: true
---
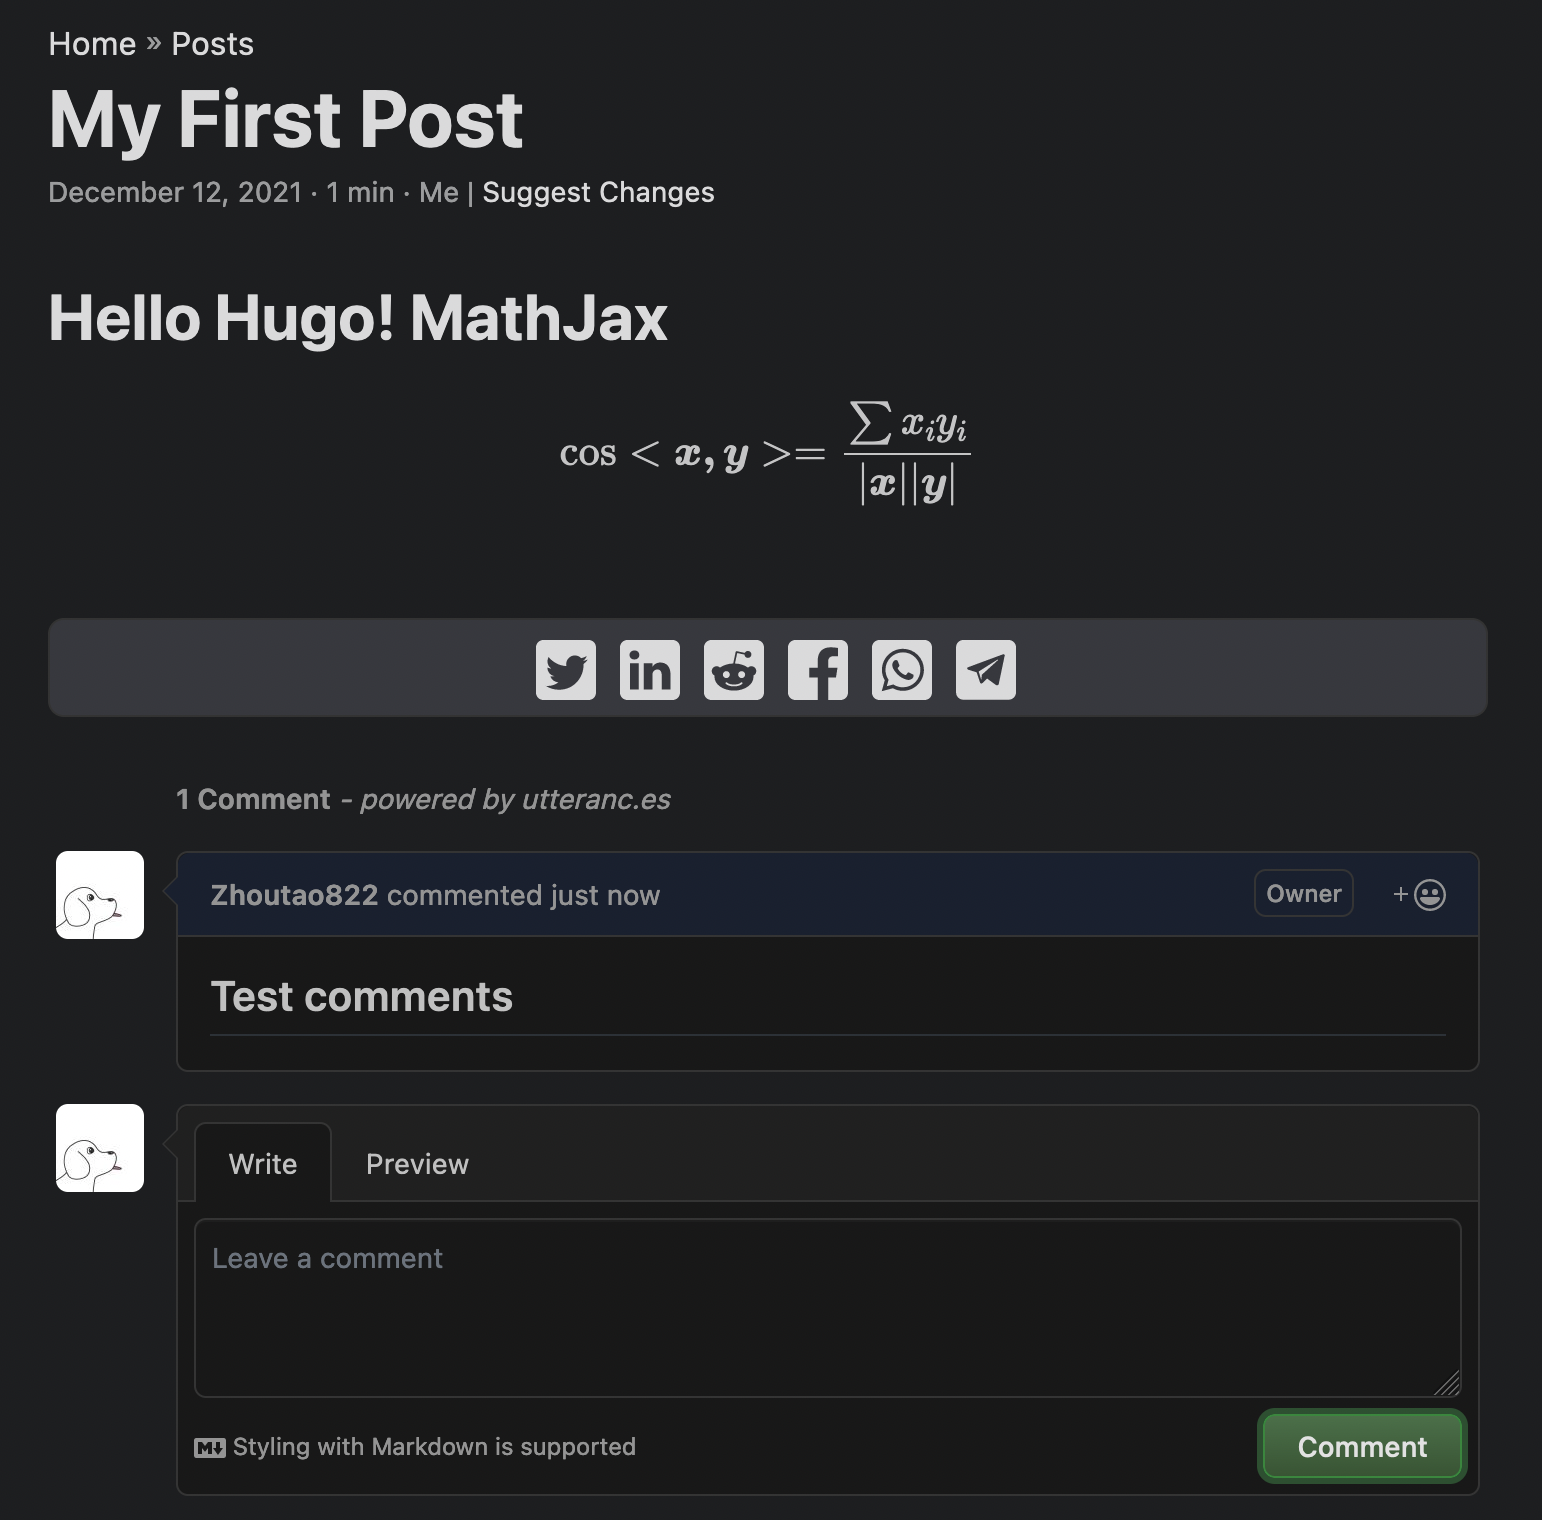
最后效果为
4.3 utteranc评论系统
博客系统必不可少的就是评论系统,utteranc是一个基于Github的评论系统,它是一个Github App,它会将评论转为issue记录在仓库中,没有额外配置。首先安装

然后创建一个文件layouts/partials/comments.html
{{ if .Site.Params.utteranc.enable }}
<script src="https://utteranc.es/client.js"
repo="{{ .Site.Params.utteranc.repo }}"
issue-term="{{ .Site.Params.utteranc.issueTerm }}"
theme="{{ .Site.Params.utteranc.theme }}"
crossorigin="anonymous"
async>
</script>
{{ end }}
最后修改config.yaml开启comments并且配置utteranc
params:
  comments: true
  utteranc:
    enable: true
    repo: "zhoutao822/zhoutao822.github.io"
    issueTerm: "title"
    theme: "github-dark"
可以到仓库的issue中查看到,此条评论被成功记录。